Jump to content
  • GUESTS

    If You  want access  to member only forums on FM, You will need to Sign-in or  Sign-Up now .

    This box will disappear once you are signed in as a member.

How-to Process Your Own Venison


Dark Cloud

Recommended Posts

Figured I'd do a "how-to" on the way my father and I butcher our deer. We de-bone them while they hang except the front shoulders. Hope someone finds it usefull for this season. It might be hard with words and photos to express what I mean, so ask questions. A video would help alot, maybe down the road i'll make one...

First we always skin them as soon as possible. We prefer to skin them from the neck down. Just seems easier and you end up with less loose hair. Then for the de-boneing, the deer will need to be hanging from the hind legs.

457ml.jpg

I prefer to use a 6 inch boning knife but a filet knife actually workes well also.

Grab the forearm and pull it away from the body a bit and with a few cuts along the body it will seperate easily...

461v.jpg

When you get down to the neck I cut in towards the bone then take the side neck meat off also. Almost like fileting a fish...

463hh.jpg

Next I take the inner filets out. These are probably the most tender part of the animal.

Start by cutting away the sides of the belly.

466bx.jpg

Then start you knife in at the top of the filet and work from the spine and top slowly working it away from the bone. It actually comes out with very few cuts...

467jx.jpg

469va.jpg

The other side is actually harder for a right hander. Just take your time and be carefull. Accidents happen when you get complacent and hurry...

Next are the backstraps.

Right where my thumb is you can feel a hip type bone. Your going to cut right below that over to the spine then down along the spine...

465o.jpg

471ge.jpg

This next picture is from removing the other side but I think it shows best how you work from the ribcage and remove the meat.

476rc.jpg

I continue all the way down and get the rest of the neckmeat now also...

474fo.jpg

Thats about it for the front end and ribcage. There may be a few pieces of neck meat and if it is a bigger deer maybe some useable meat up around the chest/brisket. These pieces will go into the "grind" pile...

Onto the hind legs...

Only 10 pictures per post so in about 10 minutes i'll have part 2 up. cool

Link to comment
Share on other sites

The hind legs...

Go to the belly part of the deer and remove the "thighs". Start your knive in right below the knee where my knife is...

477s.jpg

Cut into the bone and follow it down...

478ky.jpg

When you get down to that "hipbone" you can work the meat around towards the back and get some more from the spine area...

480s.jpg

Now around to the backside.

Start your knife in at the back of the knee where I have it. If you cut too high and get the tendon, the whole thing will fall...

482i.jpg

Now work down to the bone. This chunk will be the hardest part of the process. Just take your time. and work down and around the bone...

483y.jpg

484i.jpg

Once you get down so far, work towards the spine. You'll see that hip bone right below my trigger finger, thats where you start working towards the spine...

485v.jpg

All that is left now except a few little pieces is the calf pat. These will only be "grinds" so however you get them off is fine.

491g.jpg

This deer was done "warm". It is alot easier for the whole process if the deer is chilled but temps were around 60 degrees and only cooling to 45 overnight. If it is going to be in the 30's we'll let them hang overnight. If not we will do this process and either place into our extra fridge or coolers on ice.

The next process of butchering is alot easier if it is chilled. And cutting warm meat is much more dangerous. The knife will be harder to control.

The next stepp involves a small stable table, a few knifes and sharpeners, some small pails for the differnt cuts. Cat, dog, and beverages optinal...

494.jpg

Dosn't matter where you start so heres a backstrap...

495.jpg

Thats 10 pictures. Part 3 in a few minutes...

Link to comment
Share on other sites

There is an outer layer that seperats from the main chunk of loin easily with you hands and a few cuts...

496.jpg

497a.jpg

One tip -- Keep a piece of paper towel close by. It is much easier to grab random pieces of hair with the towel.

Next lay the loin with the silverskin down and filet it off...

498.jpg

I find it easier to start in the middle and do this in two pieces...

499j.jpg

I clean all silverskin, fat, and hair from all the meat. Some of the loins I package whole for grilling, and some gets sliced for either grilling or diff saute/sauce dishes...

501.jpg

502d.jpg

The end opposite the hip up towards the neck i'll trim away fat, blood, and conective tissu. Most of this will be used in "grind". Maybe a few nicer pieces will get cut up for kabobs. Smaller pieces get packaged for soup/stew...

503r.jpg

The inner filet or tenderloin...

505d.jpg

Just clean it up and trim off any undesireables...

506d.jpg

These I'll either leave whole or cut into 3-4 strips. Marinate and grill, dont overcook. We had them for lunch marinaded in a vinegrette i made with olive oil, red-wine vinegar, lemon juice, salt n pepper, garlic, and horseradish-mustard...

540x.jpg

10 picts again. Part 4 comming right up....

Link to comment
Share on other sites

The front legs...

All of this for us goes into grinds, ie - sausage, kielbasi, burger, brats, sticks...

Just follow the bone and take a big top chunk and bottom piece....

509r.jpg

510i.jpg

The shoulder plate...

Right where my knife is there is a "ridge"...

511.jpg

Cut on either side of it and filet the meat off...

512.jpg

513.jpg

Flip the leg over and filet off the other side of the plate.

514i.jpg

Now the forearm...

515e.jpg

Now the hamstring part of the hindleg...

519j.jpg

Flip it over and it will look like this, you can start to seperate the muscle groups...

520hl.jpg

I "seam out" the whole chunk in pieces...

521f.jpg

10 pictures! Part 5 soon. crazy

Link to comment
Share on other sites

Pt 5!

521f.jpg

Each of these chunks I carefully remove any fat and all the connective tissue and silver skin. The two bigger chunks can make a good roast if thats what you like...

Some of the pieces I clean up and slice with the grain for jerky...

530n.jpg

Others I cut thin across the grain for sandwiches or picatta. Place them between saran wrap and pound them thin, toss them in seasoned flour, into beaten eggs, then into seasoned breadcrumbs, fry them, hot and quick. Onto a nice roll with some cheese and roasted red peppers. cool Or just dredged in seasoned flour and quick fried, into some kind of gravey or sauce, along with smashed taters or rice...

524d.jpg

Some is also cut into pieces for kabobbs(locally called spiedies)

Smaller pieces I use in chili. stew, and soup...

532k.jpg

Besides some random scraps that need cleaning up all that is left is the front thigh...

533v.jpg

With your hand and knife there is a "cap" that removes...

536y.jpg

This chunk makes a nice crock-pot roast, or sliced lengthwise for jerky, or can be cut across for steaks...

534t.jpg

Thats about it!!! Hopefully you folks that already cut your own picked up something from this. And maybe it inspires someone to try it themselfs.

There are some great butchers out there that put out a great product but it is nice doing it yourself and knowing exactly what goies into things and how things are handled. While saveing money... grin

Link to comment
Share on other sites

Nicely done, I do pretty much the same thing. I taught a couple budies this year so it'll be a little quicker next year :)That grill pic made me hungry grin

Link to comment
Share on other sites

much more efficient than I that is for sure! although I just through all my meat into sausage anyhow... but the back straps i think are the best part by far. Those I make sure I take out correctly the rest of it looks like oj got to it.

Link to comment
Share on other sites

I like it, very nice, the one thing that I think too many hunters do is use their skinning and gutting knives. A flexible fillet knife is a must have for cutting up deer quickly and efficiently.

Do you take left over meat and grind it, You do a great job getting the big roasts and meat chunks, but what about the trim, do you keep, or throw? What percentage of the meet do you get off of deer, we usually run 35 to 40% of the field dressed deers weight.

Link to comment
Share on other sites

DC, outstanding job I will make sure this is stickied to the top of this page for sure. That last picture is what we call football roasts and I prefer to steak them out, my friend uses them as roasts, either way, those roasts are the bomb.......

Link to comment
Share on other sites

Nice job and nice pictures Dark Cloud!!! Thanks for putting forth the effort!!! I'm going to try and figure out how to print these off on a color printer!!! I'm inspired to try butchering one myself!!! I've done a couple deer on my own, can get the hide off ok, but then getting the chunks off and cut up nicely is a mystery. Thanks!!!

Link to comment
Share on other sites

Trigger - We use alot of "trim". We go through all the meat and remove, hair, fat, and blood. The tougher fiberous meat will go right through the grinder.

My dad and I are usually good for 2-3 deer each and we like venison alot but also work at ways to use it up.

I use to work at a butcher shop and still have access to the grinder which is nice.

We use alot of burger. Most of this I grind with beef fat, ie trim from a rib-eye at a 10-15 percent ratio. This gets used in taco's, chili, stuffed cabbage and peppers, ect...

I also make alot of hamburgs. This I started grinding with bacon. 1 pound of bacon per 5 pounds of venison works out nicely. Mix in some seasonings and its great...

I also just made 10 pounds of meatballs and 10 pounds of brats that were both 50/50 venison to pork.

We also usually make some kielbasi, summer sausage, breakfast sausage, and sticks...

Most of the time from the average deer we have 18-22 pounds of trim. Im not sure on total weight but somewhere around 35% sounds right...

Link to comment
Share on other sites

Very nice DC. I do it about the same. I use a Cutco fillet knife for cutting up my meat and it works very well.

One takes a little pride in processing ones own deer.

Thanks for the pictures.

Link to comment
Share on other sites

  • 'we have more fun' FishingMN Builders

Nice work, we use about the same boning technec. So what did your camera look like after you took a shot, cut, took a shot! grin Thanks for the work, it should be helpful. wink

Link to comment
Share on other sites

This is great info and interesting to read. May have to try it sometime. On a recent work trip, I sat next to a guy on the plane to New Orleans coming back from a Canada duck hunting trip. We talked hunting for several hours and he instructed me in graphic detail (complete with hand motions) on the gutless method of field dressing and quartering a whitetail, much to the chagrin of some non-hunters next to us. He mostly hunted Alabama for deer and it was interesting to compare notes. The bag limits there are basically limitless on the deer you can take. He was dumbstruck to find I could only take one.

In any case, here's how I process my own deer. First I put it in the back of my truck, then I tie it down. Next I drive it to the Belgrade Meat Center. Then I go home, have a beer and wait for about a week before they call me to come get my steaks, chops and tons of wonderful breakfast sausage, summer sausage, snack sticks, and weiners. Sure its not really doing it myself but I like the guys there and they do an awesome job with everything so I like to give them my business. I will have to try it on my own someday though and this is good information to have.

Link to comment
Share on other sites

It looks like a clean and efficient method. It's always interesting to see how others process and butcher their deer. I came to deer hunting later in life with no one around to show me how to hunt or to field dress and butcher a deer. Luckily there are excellent videos out there and up in this neck of the woods Bill Hesselgrave; from Superior, WI; puts out an outstanding one. He also does seminars and I've seen him twice at the Duluth Gander Mountain. He goes through the whole process--from field dressing to packaging. Another good source for folks wanting the savings and satisfaction of dealing with your own animal.

Link to comment
Share on other sites

Quote:

In any case, here's how I process my own deer. First I put it in the back of my truck, then I tie it down. Next I drive it to the Belgrade Meat Center.

Classic. grin

Dark Cloud - very nice tutorial.

Link to comment
Share on other sites

Hey dark cloud. I've been cutting deer for the better part of 30 years and that is one of the best DIY's I've seen. Very nice job.

PS: say Hi to "tony on ice" for me.

From one of the original shanty gang guy's.

MNice

Link to comment
Share on other sites

MNice - Nice to see you here!

Dark Cloud - Excellent! Very similar to how we do it also.

I learned some things on your presentation on the hind quarters that I am going to adopt for sure.

If you like to work standing up once the meat is of off the carcass, here is what I did. I have a Craftsman tool box on wheels with the wood work surface on the top. I picked up a 4 foot length of kitchen counter top from a big box store. It has the back splash on it, but more importantly, the front of the counter top has that little ledge underneath that keeps the whole works from sliding off the bench top.

It is very comfortable to work at that height and there is room for two to cut an trim.

It's easy to keep clean, and it does not take much storage space when we are done.

In addition, if its really cold outside, I can bring the counter top in and use it in the kitchen, or on the dining room table.

It works great for grinding and stuffing too!

Link to comment
Share on other sites

Gissert, I would have to live in the garage if my wife caught me cutting up my deer in the kitchen... great tutorial Dark CLoud

Link to comment
Share on other sites

Nicely done Dark Cloud!

I finally completed my deer processing last night after several hours of cutting up my deer, and cleaning the meat. I'm beat. Thankfully, the temperatures have been great to work with.

Link to comment
Share on other sites

Great work DC! Those are the best photos/instructions I have seen yet. I do it the same way but sure could have used this info 20 years ago.

One tip I will throw in is I never cut my steaks up before freezing, I keep the meat in a whole chuck. I belive this helps the meat hold its moisture and it only takes a minute to cut your steaks up fresh before they land on the grill.

Link to comment
Share on other sites

Dark Cloud, what a great presentation for those that are unfamiliar or need a refresher. I too will adopt a bit of your technique. In fact, I just got done.

Link to comment
Share on other sites

Quote:

In any case, here's how I process my own deer. First I put it in the back of my truck, then I tie it down. Next I drive it to the Belgrade Meat Center.

Classic. grin

Dark Cloud - very nice tutorial.

Yes, and in all seriousnes - and my approach aside, I just printed this out on the home computer. My wife may need to buy some new color cartridges. I'd love to try this some day and this is the best step by step instruction I've seen to date.

Link to comment
Share on other sites

Great information Dark Cloud!

I learned to do it the exact same way from a guy who used to work in a butcher shop (like you did).

About the only thing I do differently is bone-out the front shoulders while still on the carcass. Doing it this way I don't dirty a countertop for 2 minutes of boning.

Then all of the meat goes into a tub (or two for bigger deer) and into the fridge to cool.

Then a day or 7 later when I have some more time and the meat is cool, I pull the cuts out of the fridge for final processing and packaging.

We also use an electric winch to hoist/skin the deer. We have an eye bolt anchored into the concrete, and use the "golf ball method" to winch the hide right off! It easily cuts skinning time in half.

When I first started butchering my own deer it took me about two hours to skin and debone. Now I can have a deer go from a furry critter to meat in a tub in under 30 minutes by myself. Even faster with a helping hand!

Link to comment
Share on other sites

  • 'we have more fun' FishingMN Creators

Very nice job DC. Looks very much like how we do it as well.

Link to comment
Share on other sites

All us former butchers salute you Dark Cloud! The more hunters that can process their own deer, the better! My knives will stay sharper for my own work too. Kidding aside, good info & great pictures.

Link to comment
Share on other sites

A friend has shown me a very similar method to butchering but he was very particular about not cutting into a gland in the thigh. Is he worrying too much. He tells me it makes for an awful taste.

Link to comment
Share on other sites

Join the conversation

You can post now and register later. If you have an account, sign in now to post with your account.
Note: Your post will require moderator approval before it will be visible.

Guest
Reply to this topic...

×   Pasted as rich text.   Restore formatting

  Only 75 emoji are allowed.

×   Your link has been automatically embedded.   Display as a link instead

×   Your previous content has been restored.   Clear editor

×   You cannot paste images directly. Upload or insert images from URL.


  • Your Responses - Share & Have Fun :)

    • mulefarm
      With the early ice out, how is the curlyleaf pondweed doing?
    • LakeofthewoodsMN
      On the south end...   The big basin, otherwise known as Big Traverse Bay, is ice free.  Zippel Bay and Four Mile Bay are ice free as well.  Everything is shaping up nicely for the MN Fishing Opener on May 11th. With the walleye / sauger season currently closed, most anglers are targeting sturgeon and pike.  Some sturgeon anglers are fishing at the mouth of the Rainy River, but most sturgeon are targeted in Four Mile Bay or the Rainy River.  Hence, pike are the targeted species on the south shore and various bays currently.   Pike fishing this time of year is a unique opportunity, as LOW is border water with Canada, the pike season is open year round. The limit is 3 pike per day with one being able to be more than 40 inches. All fish 30 - 40 inches must be released. Back bays hold pike as they go through the various stages of the spawn.  Deadbait under a bobber, spinners, spoons and shallow diving crankbaits are all viable options.   Four Mile Bay, Bostic Bay and Zippel Bay are all small water and boats of various sizes work well. On the Rainy River...  Great news this week as we learned sturgeon will not be placed on the endangered species list by the U.S. Fish and Wildlife Service.     The organization had to make a decision by June 30 and listing sturgeon could have ended sturgeon fishing.  Thankfully, after looking at the many success stories across the nation, including LOW and the Rainy River, sturgeon fishing and successful sturgeon management continues.   A good week sturgeon fishing on the Rainy River.  Speaking to some sturgeon aficionados, fishing will actually get even better as water temps rise.     Four Mile Bay at the mouth of the Rainy River near the Wheeler's Point Boat Ramp is still producing good numbers of fish, as are various holes along the 42 miles of navigable Rainy River from the mouth to Birchdale.   The sturgeon season continues through May 15th and resumes again July 1st.   Oct 1 - April 23, Catch and Release April 24 - May 7, Harvest Season May 8 - May 15, Catch and Release May 16 - June 30, Sturgeon Fishing Closed July 1 - Sep 30, Harvest Season If you fish during the sturgeon harvest season and you want to keep a sturgeon, you must purchase a sturgeon tag for $5 prior to fishing.    One sturgeon per calendar year (45 - 50" inclusive, or over 75"). Most sturgeon anglers are either a glob of crawlers or a combo of crawlers and frozen emerald shiners on a sturgeon rig, which is an 18" leader with a 4/0 circle hook combined with a no roll sinker.  Local bait shops have all of the gear and bait. Up at the NW Angle...  A few spots with rotten ice, but as a rule, most of the Angle is showing off open water.  In these parts, most are looking ahead to the MN Fishing Opener.  Based on late ice fishing success, it should be a good one.  
    • leech~~
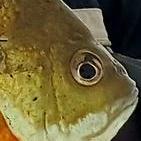
      Nice fish. I moved to the Sartell area last summer and just thought it was windy like this everyday up here? 🤭
    • Rick G
      Crazy windy again today.... This is has been the norm this spring. Between the wind and the cold fronts, fishing has been more challenging for me than most years.  Panfish have been moving in and out of the shallows quite a bit. One day they are up in the slop, the next they are out relating to cabbage or the newly sprouting lilly pads.  Today eye guy and I found them in 4-5 ft of water, hanging close to any tree branches that happened to be laying in the water.  Bigger fish were liking a 1/32 head and a Bobby Garland baby shad.   Highlight of the day way this healthy 15incher
    • monstermoose78
    • monstermoose78
      As I typed that here came a hen.  IMG_7032.mov   IMG_7032.mov
    • monstermoose78
      So far this morning nothing but non turkeys. 
    • monstermoose78
      Well yesterday I got a little excited and let a turkey get to close and I hit the blind!!
    • smurfy
      good......you?? living the dream..in my basement playing internet thug right now!!!!!! 🤣 working on getting the boat ready.......bought a new cheatmaster locator for the boat so working on that.   waiting for warmer weather to start my garden!!!
    • monstermoose78
      How is everyone doing? Holy moly it’s chilly this morning I stayed in bed and will hunt later today when it warms up.
×
×
  • Create New...

Important Information

By using this site, you agree to our Terms of Use and Privacy Policy. We have placed cookies on your device to help make this website better. You can adjust your cookie settings, otherwise we'll assume you're okay to continue.